Your cart is currently empty!
How to generate a flight plan for X-Plane?
Welcome to our step-by-step tutorial on how to plan a flight route for X-Plane 11 or X-Plane 12 using XPFlightPlanner, the ultimate flight planner and route generator. Whether you’re a beginner or an experienced pilot, this guide will walk you through the process of creating a detailed flight plan to enhance your virtual flying experience.
Step 1: Launch XPFlightPlanner
Start by launching XPFlightPlanner on your computer. Once the application opens, you’ll be greeted with the main window, which consists of four sections: the map, flight plan table, list of available points, and the detail panel.
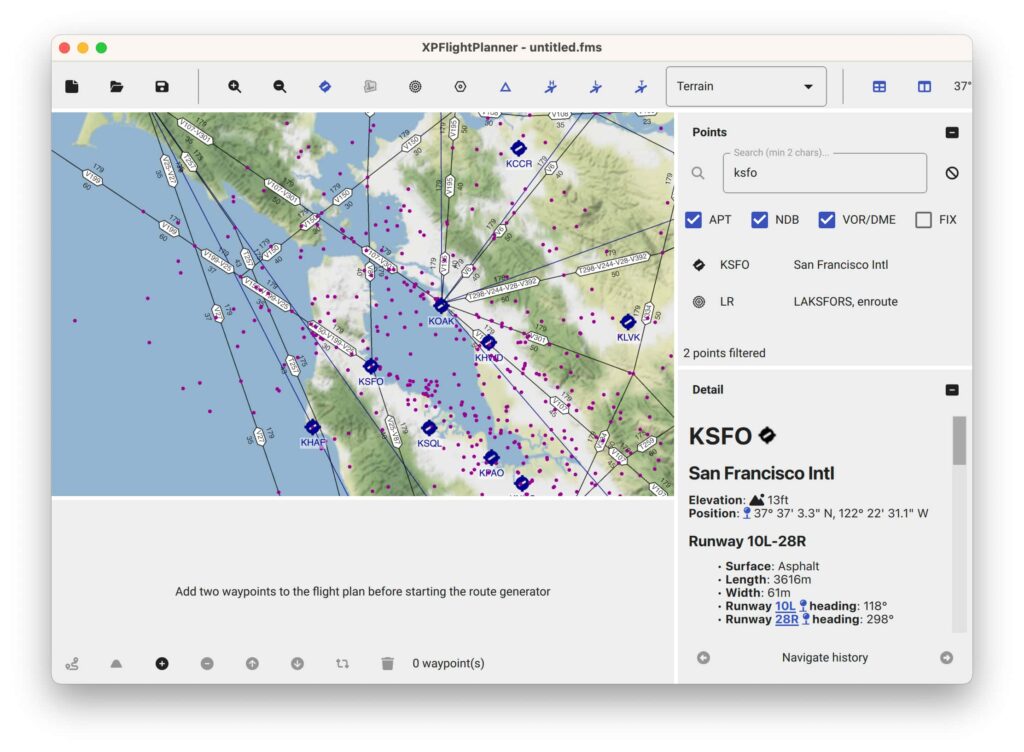
In our comprehensive user manual, you’ll find detailed guidance on installing XPFlightPlanner and discovering its intuitive user interface.
Step 2: Select your departure and destination
Select your departure and destination airports to begin creating your flight plan. First select your departure airport you can do this by:
- double-click an airport on the map or,
- right-click an airport on the map and select “Start from” in the drop-down menu or,
- search for an airport in point list located at the right side panel (then double-click or right-click)
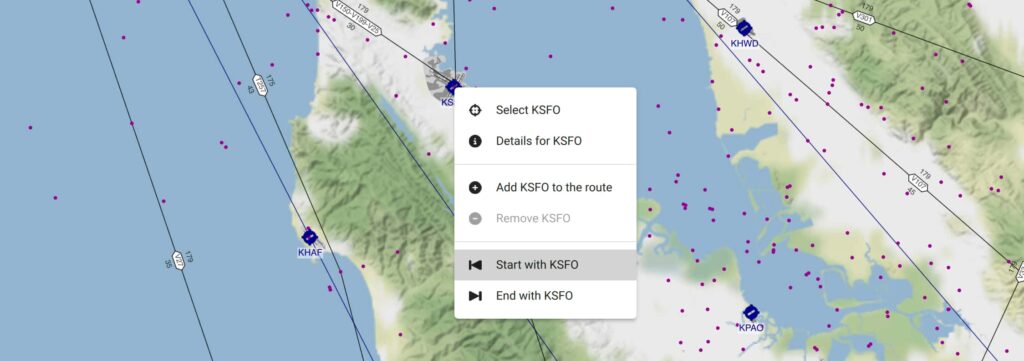
Next, with the same method select the destination airport. XPFlightPlanner will automatically create a direct route between these two points as a first version for your flight plan.
Step 3: Access the flight plan generator
The flight plan generator will help to optimize your route, go to the menu “Route” and click on the “Generator” item. You can also open the generator with the button at the bottom left of the flight plan table. The flight plan generator dialog will open, offering you various options to customize your flight plan.

Step 4: Configure the flight plan generator
Configure the flight plan generator in the generator dialog, you can specify the aircraft you’ll be flying, the cruise speed, and the desired flight level. Additionally, you can choose to include SID (Standard Instrument Departure) and STAR (Standard Terminal Arrival Route) procedures if your departure and arrival airports have them available.
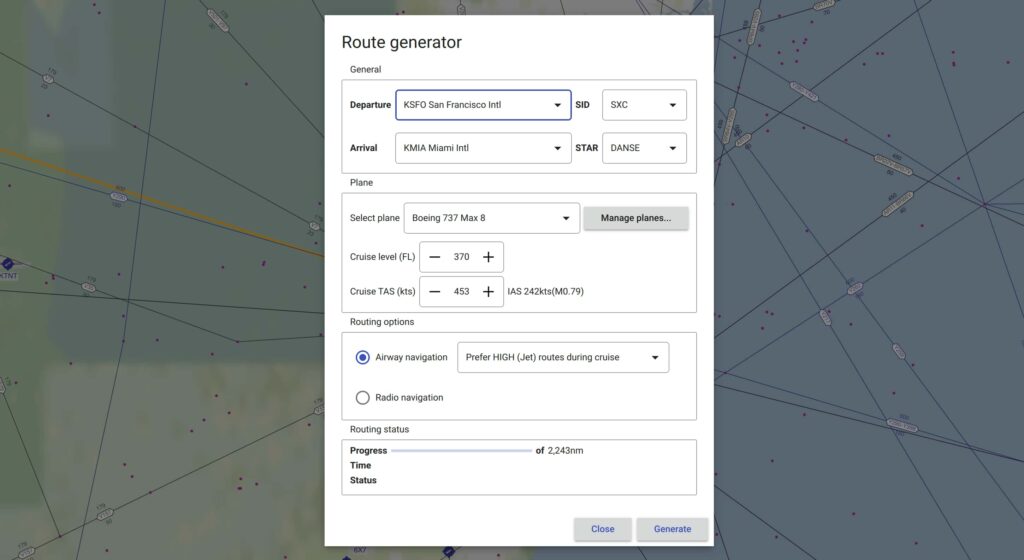
Learn more about the flight plan generator in the user manual‘s dedicated chapter.
Step 5: Generate the flight plan
Generate the flight plan after configuring your routing options in the generator dialog, click the “Start” button to initiate the route generation process. XPFlightPlanner will analyze the selected points and create an optimized flight plan based on the chosen settings.

One the flight plan generator has terminated you can either close the generator window or modify the routing settings to try for generating another route.
Step 6: Review and modify your flight plan
Review and modify your flight plan after you closed the generator dialog, the resulting flight plan will be displayed on the map and in the waypoints table. You can now review your route, including any SID and STAR procedures if selected. Feel free to modify the flight plan as needed by clicking on specific points on the map or using the flight plan table.
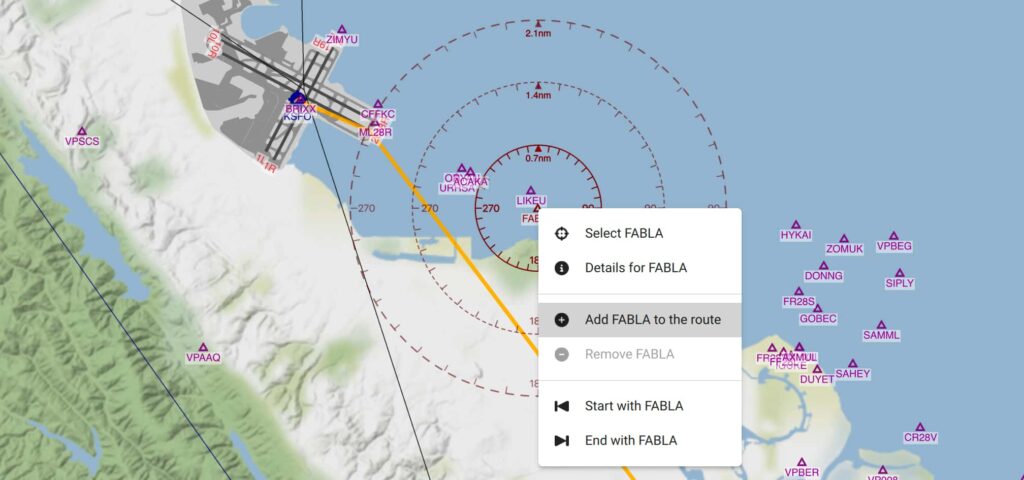
Double click or right click on a point (on the map or in the point list) to add it to the flight plan (or to remove it if already included). You will find more detail about manual flight plan modification in the dedicated chapter of our comprehensive used manual.
Step 7: Save your flight plan
Click the “Save” button to store it on your computer in the XPFlightPlanner format (*.fpxml) for future use. Get more information about the fpxml format in the user manual.
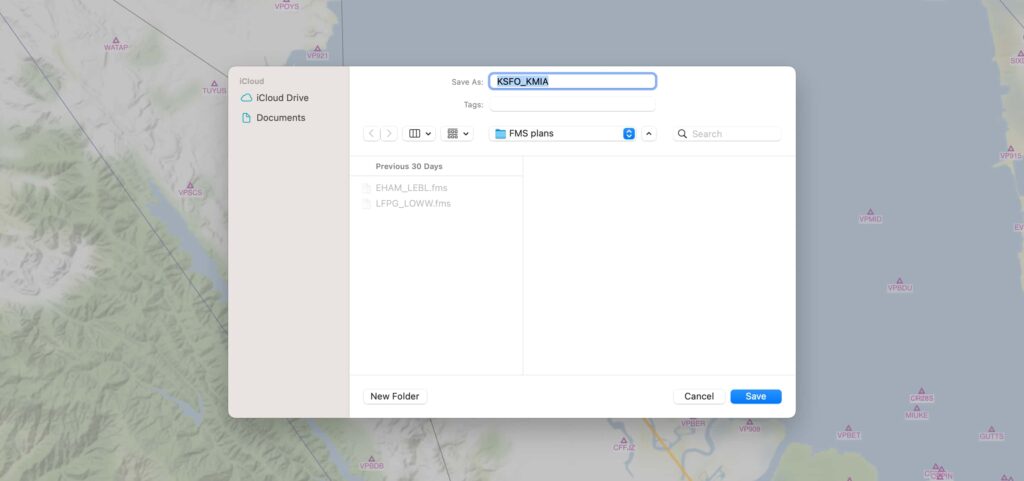
Then export the flight plan in the FMS format from the “File > Export” menu. We recommend saving your flight plans in X-Plane’s designated folder: <X-Plane 12>/Output/FMS plans for easy access during your flight simulations. Read the chapter about export in the user manual for more information.
Step 8: Load your flight plan in X-Plane
Load your flight plan in X-Plane With your flight plan ready, launch X-Plane and open the Flight Management System (FMS). From the FMS, click the “Route Menu” button, followed by the “Co Route List” button. Select your saved flight plan from the list, and you’re all set to embark on your virtual flight!

That’s it! You’ve successfully generated a flight plan for X-Plane using XPFlightPlanner. Enjoy your time in the virtual skies with the confidence of an accurately planned route and seamless flying experience. Happy flying!